Building Your Own Compost Bin: A Step-by-Step Guide
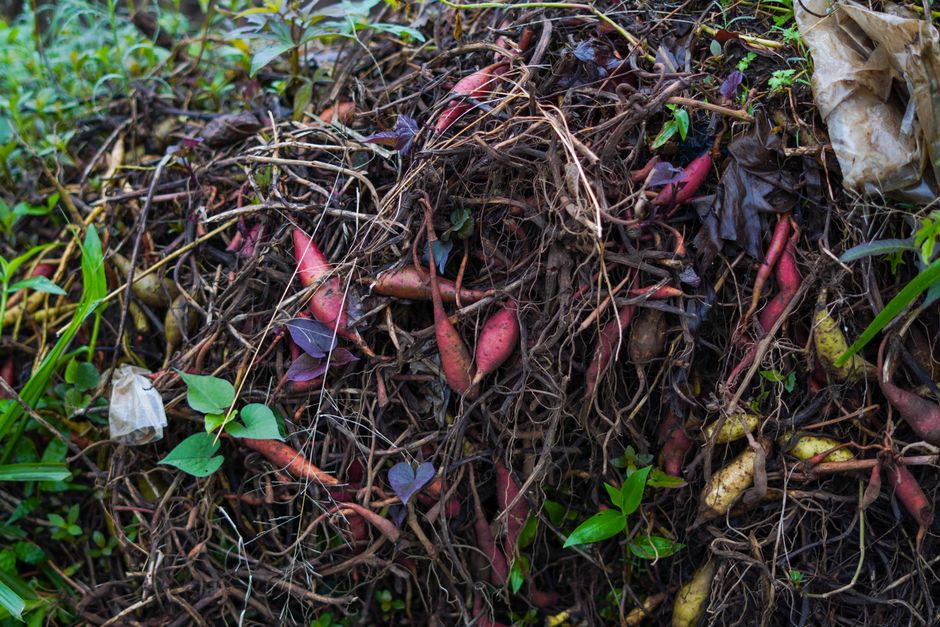
Composting is a process that transforms organic waste into a valuable soil amendment. Building your own compost bin can be a practical project for gardeners and homeowners interested in reducing kitchen and yard waste. This guide outlines a step-by-step approach to constructing a simple compost bin, selecting an appropriate site, and managing the composting process effectively.
The methods described here focus on fundamental principles of composting, which involve the breakdown of organic matter by microorganisms. Success depends on several factors, including moisture, aeration, and the balance of carbon-rich and nitrogen-rich materials. By following the steps below, an individual can create a functional composting system tailored to their space and needs.
Selecting the Right Location
Choosing an appropriate location for a compost bin is a critical step that influences the decomposition process. The ideal spot is an area with good drainage, allowing excess water to flow away easily. Poor drainage can lead to waterlogged conditions, which restrict airflow and slow down decomposition. Additionally, a location with level ground ensures stability for the bin and simplifies turning and maintenance.
Accessibility is another consideration. Placing the bin near a water source can facilitate moisture management, while proximity to the garden or kitchen reduces the effort required to transport materials. Many people choose a spot that is partially shaded, as direct sunlight can dry out the pile and extreme heat can inhibit microbial activity. However, some sunlight is beneficial for warming the pile during cooler months.
Space requirements depend on the intended volume of compost. A typical bin measures three feet wide, three feet tall, and three feet deep, as this size provides sufficient insulation and mass for efficient decomposition. For larger households, additional bins may be necessary to handle more waste. It is also advisable to leave some space around the bin for easy access and turning.
Gathering Materials for the Bin
There are numerous designs for homemade compost bins, each with its own advantages. One of the simplest and most cost-effective options is a wire mesh bin. This requires hardware cloth or chicken wire, which can be shaped into a cylinder and secured with zip ties or wire. Another popular choice is a wooden pallet bin, constructed by arranging four pallets into a square and fastening them together. This design allows for easy disassembly and rearrangement.
For those who prefer a more contained system, a plastic bin with a lid can be used, though these may require additional holes for ventilation. Alternatively, a tumbler-style bin is commercially available but can also be constructed from a barrel. The chosen material should be durable and able to withstand moisture and temperature changes. Avoid using treated wood, as chemicals may leach into the compost.
When gathering materials, consider the size of the bin in relation to available space and the volume of waste generated. It is also helpful to have a pitchfork or a compost aerator for turning, and a cover such as a tarp to protect the pile from heavy rain or excessive sun.
Building the Compost Bin
To build a wire mesh bin, start by measuring and cutting the wire to the desired length. A typical length is around ten feet for a three-foot diameter bin. Form a cylinder by overlapping the ends and securing them with wire or zip ties. Place the bin in the chosen location and ensure it is stable.
For a wooden pallet bin, arrange three pallets to form three sides of a square, leaving the front open. Secure the corners using screws or heavy-duty zip ties. The open side allows easy access for turning and removal. A fourth pallet can be used as a removable front door, or the bin can be loaded from the top. To enhance stability, drive stakes into the ground at the corners and attach them to the pallets.
Another option is a simple three-bin system, which involves constructing three adjacent bins using wire or pallets. This design allows for the rotation of compost as it matures, with one bin for fresh waste, one for active composting, and one for finished compost. Regardless of the design, ensure there are openings for aeration, such as gaps in the pallets or holes drilled in plastic bins.
Adding Organic Waste: Green and Brown Materials
Composting relies on a balanced mixture of green and brown materials. Greens are rich in nitrogen and provide protein for microorganisms. Examples include fruit and vegetable scraps, grass clippings, coffee grounds, and plant trimmings. Browns are carbon-rich and provide energy; they include dry leaves, straw, shredded cardboard, and wood chips. A ratio of roughly two to three parts browns to one part greens by volume is often recommended, though the exact optimum can vary.
Using a variety of materials enhances the nutrient profile of the finished compost. However, certain items should be avoided, such as meat, dairy, and oily foods, which can attract pests and create odor. Disease-ridden plants and weeds with seeds may survive the composting process if temperatures are not high enough.
When adding materials, it is helpful to chop or shred larger pieces to increase surface area for microbial activity. This also accelerates decomposition by allowing microorganisms to access more of the material.
Layering and Maintaining the Pile
Building a compost pile involves alternating layers of green and brown materials. Start with a layer of coarse browns at the bottom to promote airflow. Then add a layer of greens, followed by another layer of browns, and continue this pattern. Each layer can be lightly watered to maintain moisture, aiming for a consistency similar to a wrung-out sponge. The pile should be built all at once if possible, as a large mass heats more efficiently than adding small amounts over time.
Regular turning is essential to aerate the pile and distribute moisture and microorganisms. Turning every one to two weeks can help maintain aerobic conditions, which are conducive to rapid decomposition. During turning, the outer material should be moved to the center to expose it to heat. The frequency of turning depends on the desired speed of decomposition; more frequent turning generally results in faster breakdown.
Monitoring the pile is necessary to adjust conditions. If the pile is too wet, add dry browns. If it is too dry, water it. A foul odor may indicate insufficient aeration, while a warm center suggests active microbial activity. Over time, the pile will shrink and darken, eventually producing crumbly, earthy-smelling compost. The duration of the process varies from two months to two years, depending on factors such as temperature, moisture, and the materials used.
Troubleshooting Common Issues
Composting issues often stem from imbalances in the pile. A pile that is too wet and smelly may have excess greens; adding browns and turning more frequently can help. Conversely, a dry and slow pile may benefit from added water and greens. If the pile is not heating up, it may be too small, too dry, or lack sufficient nitrogen.
Pests such as rodents or flies can become a problem if food scraps are not adequately covered with browns. Ensuring a layer of browns on top can reduce odors and deter pests. In the case of persistent issues, bin designs with tighter construction or sealed lids may be necessary.
It is important to recognize that the composting process is not entirely predictable, and outcomes may vary based on environmental conditions. Patience and observation are key. A well-maintained pile will eventually yield compost that can be used to enrich garden soil, but the timeline and quality can be influenced by many factors beyond control.
Composting turns organic waste into a valuable resource, with the process itself as rewarding as the final product.
Building and maintaining a compost bin is a straightforward project that requires attention to location, materials, and ongoing care. By following the steps outlined, individuals can create a system that suits their needs and contributes to sustainable waste management. The resulting compost can support soil health and plant growth, though its use should be guided by general gardening principles.